
How to Add Downspout to Gutter Runs That Keep Spilling Over
Add a Downspout Before Gutter Overflow Damages Your Home
To add a downspout to a gutter that keeps overflowing, choose a location near the overflow point or roof valley, confirm the gutter can slope toward it, cut and seal a matching drop outlet, then attach elbows and a vertical downspout. Finish by sending water onto a positively sloped area at least 5 feet from the foundation, or through a properly sloped underground drain that terminates farther away.
An extra downspout can relieve a gutter run that carries too much roof runoff for one outlet, especially during Maryland’s intense rainstorms. It also helps keep water from spilling over the gutter edge, soaking siding, eroding landscaping, and saturating soil beside the foundation.
The key is not simply adding another vertical pipe. The new outlet must be sized for the roof area, placed where water can reach it by gravity, sealed tightly, and secured plumb to the wall. This guide explains how to plan and install it without creating leaks or directing the problem toward your basement.
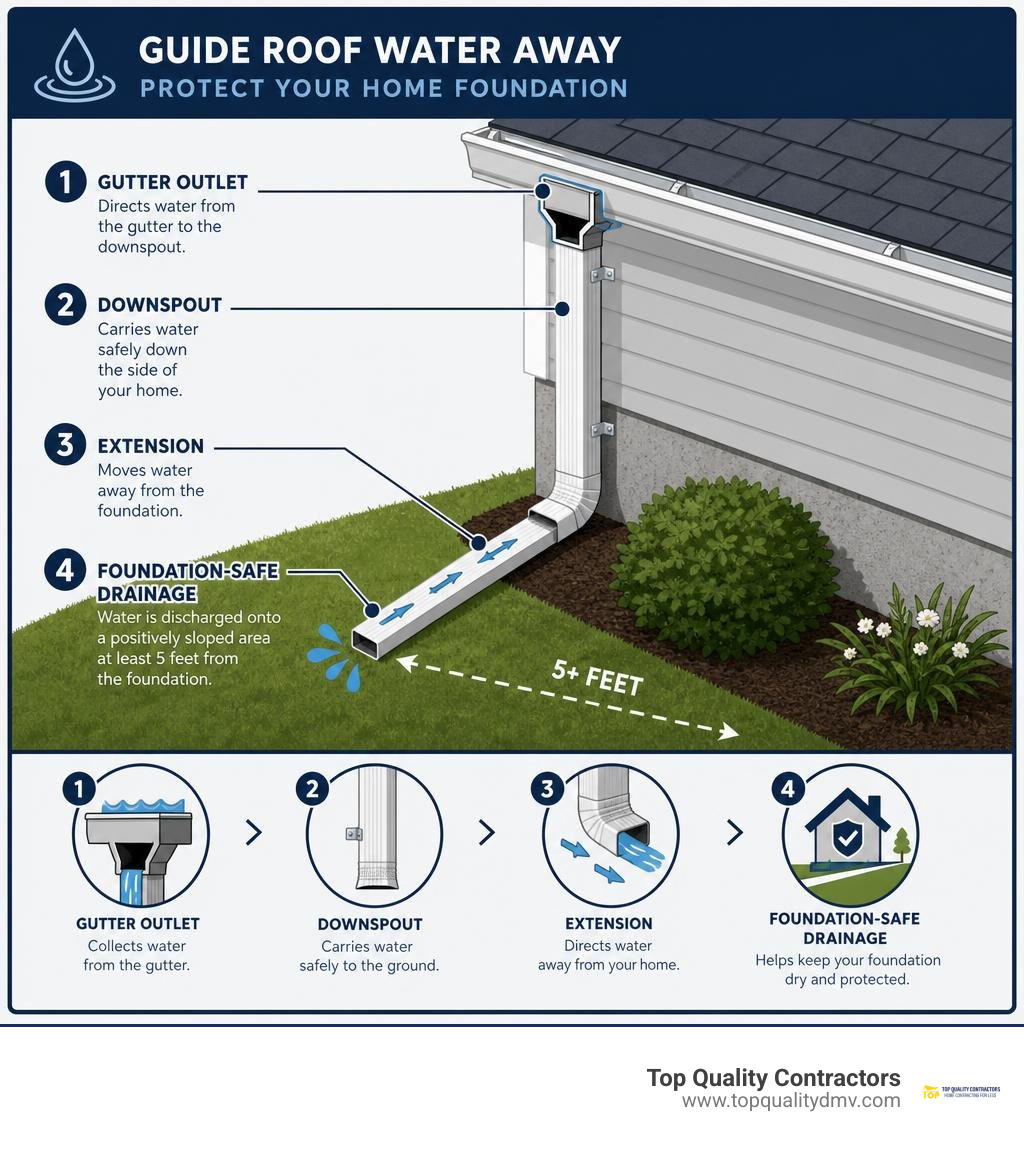
Evaluating When and Where to Install Additional Downspouts
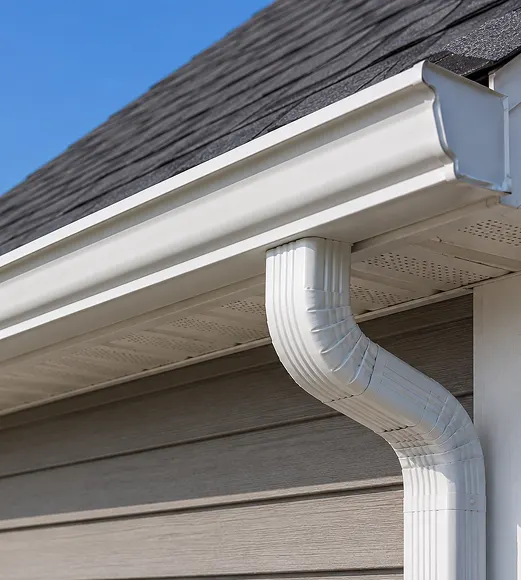
A single downspout cannot always manage the hydraulic load delivered by complex rooflines. When heavy precipitation overwhelms a drainage trough, the resulting cascading water saturates perimeter soils, creating hydrostatic pressure that pushes moisture through masonry walls and causes costly home water damage.
To prevent structural deterioration, downspouts should be spaced every 20 to 50 linear feet along a trough run. Evaluating the drainage system requires identifying where roof valleys concentrate runoff, calculating the water volume generated during peak storms, and confirming that the fascia board provides solid backing for new mounting hardware.
When and Why to Add Downspout to Gutter Runs
Water spilling over a gutter edge does not always point to a simple leaf clog. Asphalt shingle roofs naturally shed mineral granules over time. These dense granules settle into trough bottoms, forming mini-dams that obstruct horizontal flow during severe storms. Multi-story roof designs also funnel massive volumes from upper eaves onto lower sections, creating localized bottlenecks.
Standard building science models show that an inch of rainfall on a 1,000-square-foot roof plane produces approximately 620 gallons of runoff. Adding a secondary drainage point relieves these hydraulic surges. Homeowners with continuous aluminum channels can easily integrate a secondary drop outlet into existing Seamless Gutters to balance discharge volumes without replacing the entire system.
Sizing Downspouts and Calculating Gutter Pitch
Downspout capacity must correspond directly to the roof drainage area. The standard building science guideline specifies 1 square inch of downspout cross-sectional area for every 100 square feet of roof surface.
Gutters must also maintain a continuous downward slope of at least 1/16 inch per linear foot (or 1/2 inch per 10 feet) toward each drop outlet. For long gutter runs exceeding 40 feet, pitch the channel downward from the center toward outlets positioned at both ends, or slope both outer ends inward toward a central drainage point.
| Gutter Profile & Size | Downspout Dimension | Cross-Sectional Area | Max Roof Drainage Area | Standard Application |
|---|---|---|---|---|
| 5-Inch K-Style | 2 in. x 3 in. (Rectangular) | 6.0 sq. in. | Up to 600 sq. ft. | Compact single-story roofs, moderate rainfall |
| 5-Inch K-Style | 3 in. x 4 in. (Oversized) | 12.0 sq. in. | Up to 1,200 sq. ft. | Roof valleys, heavy rainfall zones, upper-tier discharge |
| 6-Inch K-Style | 3 in. x 4 in. (Rectangular) | 12.0 sq. in. | Up to 1,200 sq. ft. | Large residential footprints, steep-pitch roofs |
| 6-Inch Half-Round | 4 in. (Round Corrugated) | ~12.5 sq. in. | Up to 1,250 sq. ft. | High-capacity drainage, vintage aesthetic profiles |
Tools and Preparation Before You Begin
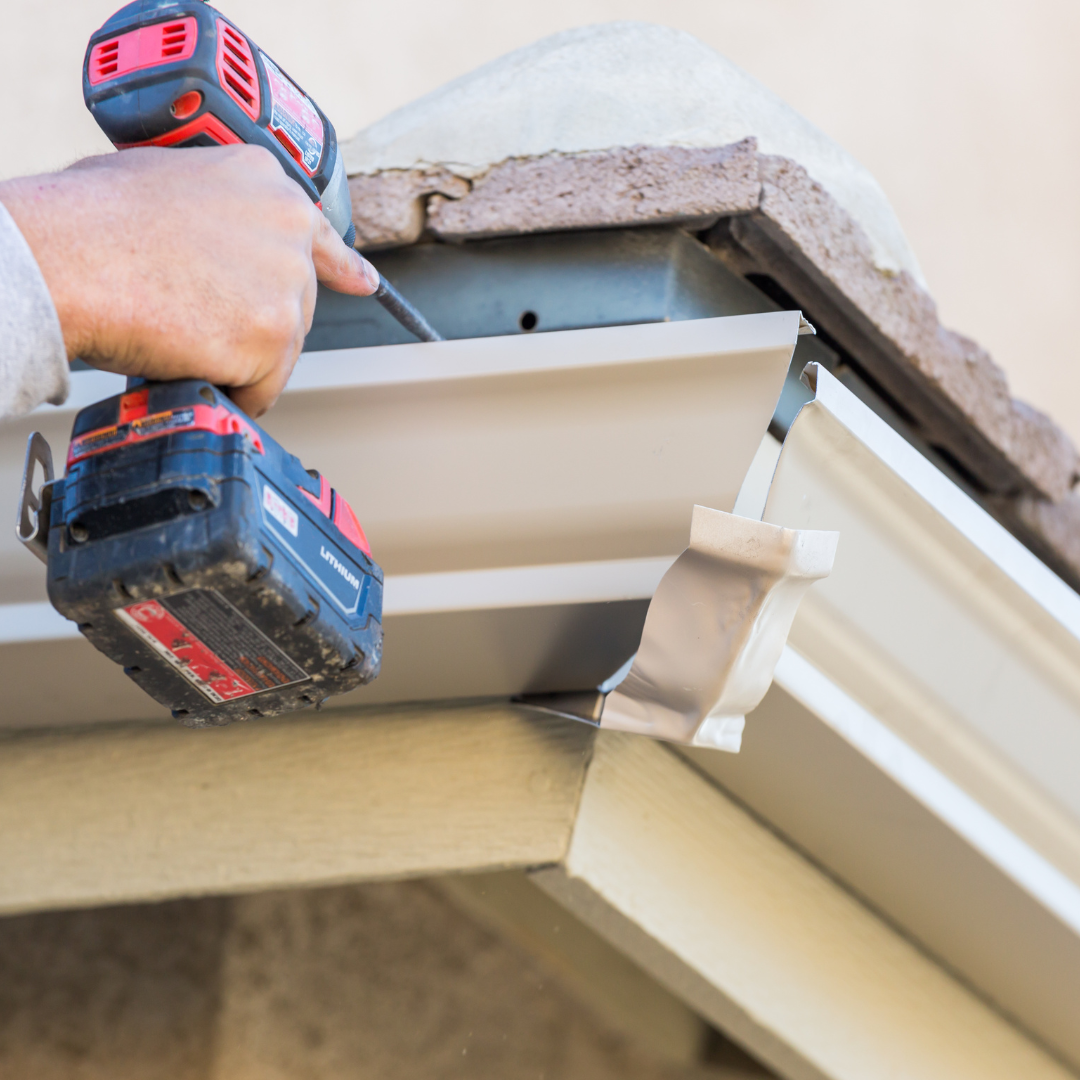
Working at roof eaves requires proper preparation, sturdy equipment, and correct fasteners to ensure long-term stability and prevent premature exterior home repair issues.
Always stage tools, fasteners, and materials on the ground before ascending ladders. Inspect the surrounding fascia board for structural rot or water softening; new downspout outlets require solid wood backing capable of supporting dynamic water weight during intense storms.
Essential Tools and Safety Prep to Add Downspout to Gutter Channels
Before cutting metal troughs, assemble the following tools and protective gear:
- Cutting & Drilling Tools: Cordless drill, 4-inch hole saw (or 1/4-inch drill bit for pilot holes), right- and left-cut aviation tin snips, and a hacksaw with a fine-tooth metal blade.
- Forming & Measuring Tools: Hand sheet metal crimper (or needle-nosed pliers), torpedo level, tape measure, and a metal deburring file.
- Fasteners & Sealants: High-grade elastomeric gutter sealant (avoid standard household silicone), 1/2-inch self-tapping stainless steel zip screws, 1/8-inch aluminum pop rivets, and substrate-appropriate wall anchors.
- Safety Gear: Cut-resistant leather work gloves, safety glasses, and a sturdy extension ladder fitted with standoff stabilizers.
To master basic sheet metal fabrication techniques before working overhead, review practical tips from DIY downspout tools and techniques.
Step-by-Step Guide to Add Downspout to Gutter Systems
Installing an additional drop outlet requires precise measuring, clean cutting, and deliberate component overlapping to keep runoff moving smoothly inside the pipe assembly.
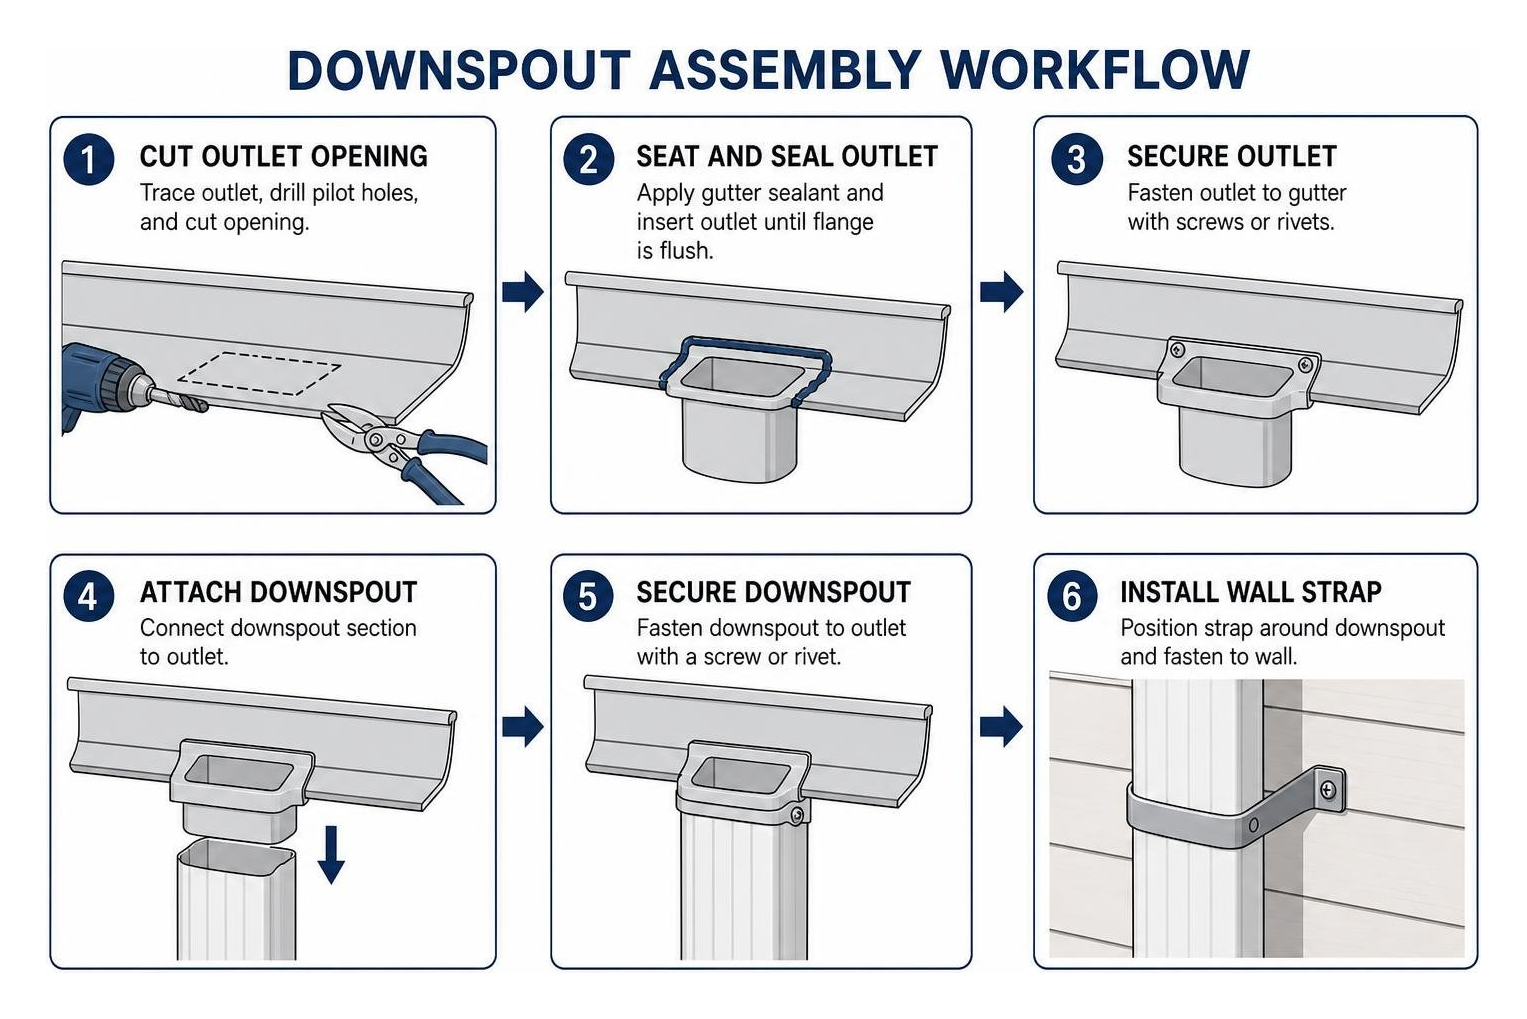
Cutting and Installing the Drop Outlet
- Locate and Trace: Position the new drop outlet against the underside floor of the gutter trough at the designated low point. Trace the inner perimeter of the outlet collar directly onto the aluminum with a permanent marker.
- Cut the Opening: Drill starter pilot holes along the inside boundary using a drill or a hole saw. Using sharp aviation snips, carefully cut out the metal slug. Smooth any jagged internal edges with a flat metal file to prevent leaves from snagging.
- Seat and Seal: Apply a continuous, heavy bead of waterproof elastomeric gutter caulk around the top flange of the drop outlet. Insert the outlet downward into the cut hole until the flange sits completely flush against the trough floor.
- Fasten the Flange: Secure the flange using short stainless steel sheet metal screws or pop rivets. Fasten the screws from the underside upward so only the smooth factory-coated screw heads are visible from below.
Assembling Elbows and Fitting Vertical Pipe
Transitioning water from the roof eave to the exterior wall requires offsetting elbows (typically 75-degree A-style or B-style elbows).
- Measure Soffit Offset: Slip the upper elbow directly over the drop outlet sleeve. Hold a second elbow flush against the exterior wall below the soffit. Measure the diagonal distance between the two elbows, adding 2 to 3 inches to account for inner slip joints.
- Cut and Crimp Transition Pipe: Cut a short segment of downspout pipe to match this measurement. Use a hand crimper to flute the lower male end of the connector pipe.
- Assemble Slip Joints: Assemble the upper elbow, transition pipe, and lower wall elbow. Ensure the upper piece always slips inside the lower piece. Reversing this orientation forces descending water outside the joint seams.
- Fasten Elbow Connections: Secure each overlapping joint with two self-tapping screws placed into the sides of the pipe. For detailed assembly methods and alignment nuances, reference this step-by-step downspout installation guide.
Securing Wall Brackets and Checking Plumb
- Check Vertical Plumb: Position the primary vertical downspout pipe against the wall, sliding its top end over the lower elbow crimp. Place a torpedo level along the front and side of the pipe to establish true vertical alignment.
- Mount Wall Straps: Install mounting brackets (straps) to anchor the assembly. For a standard one-story home (8 to 10 feet), install 3 straps: one 6 inches below the top elbow, one at the midpoint, and one 6 inches above the bottom elbow. For two-story walls (11 to 15 feet), space 4 straps evenly every 4 to 5 feet.
- Anchor to Substrates: Fasten straps into siding studs using corrosion-resistant wood screws. When mounting to brick, stone, or stucco, pre-drill with a masonry bit and insert expansion wall plugs.
- Allow for Expansion: Avoid over-tightening wall straps. Leaving a 1/16-inch clearance allows thin-gauge aluminum to expand and contract naturally during extreme temperature shifts without warping.
Diverting Runoff Away From Your Foundation
Collecting roof runoff is only half the battle; managing ground discharge protects structural footings. Concentrated water dumped adjacent to a house destabilizes surrounding soil. Expansive clay soils swell significantly when saturated, generating lateral loads strong enough to crack basement walls and buckle floor slabs.
To prevent structural compromise, observe strict discharge setbacks and follow guidelines on proper downspout discharge and disconnection.
Surface Extensions, Splash Blocks, and Underground Drains
- Surface Extensions: Solid aluminum or heavy-gauge PVC extensions should channel water across a positive grade sloping away from the foundation at a minimum 5% pitch (5/8 inch per foot). Surface lines must discharge daylight water at least 5 feet from foundation walls (at least 6 feet for homes with full basements).
- Splash Blocks: Heavy concrete, composite, or natural stone splash blocks placed beneath the discharge elbow prevent soil erosion and distribute bulk runoff into turf.
- Underground Drainage Pipes: For a cleaner yard aesthetic, connect downspouts into non-perforated Schedule 40 PVC or smooth-interior ABS solid pipes sloped at least 1/2 inch per foot. Underground pipes must terminate at a daylight pop-up emitter or dry well located at least 10 feet away from the foundation. Always incorporate an inline debris clean-out tee near ground level to facilitate seasonal home gutter cleaning and flushing.
Climate Considerations and Winterizing
In cold winter climates across Maryland, melting snow re-freezes inside downspouts, creating interior ice plugs that cause heavy ice dams along roof eaves. Ensuring unobstructed pipe flow and clearing autumn debris are essential parts of regular home winter maintenance.
In areas near dense tree canopies, install fine mesh leaf screens and integrated drip edges to prevent organic debris from accumulating in horizontal channels. To exclude rodents, squirrels, and birds from entering open pipe bases, install 12-inch metal exclusion cones, low-resistance flap valves, or wire leaf strainers at upper drop outlets.
Frequently Asked Questions About Adding Gutter Downspouts
How far should downspouts drain away from the foundation?
Surface downspout extensions should discharge water at least 5 feet away from the foundation on a downward slope (at least 6 feet for homes with basements). Underground catchment lines and dry wells must terminate at least 10 feet away to prevent moisture from migrating back toward concrete footings.
Can you add a downspout to seamless gutters without removing them?
Yes. Seamless gutters do not need to be taken down to install an additional outlet. You can cut the drop opening directly into the bottom of the hung trough using a hole saw or aviation snips, insert the drop outlet flange from above, seal the perimeter with gutter caulk, and assemble downspout piping downward along the wall. Upgrading older, leaking systems provides numerous long-term Seamless Gutters Benefits, including fewer seam leak points and cleaner exterior lines.
Can you connect downspouts directly into foundation footing drains?
No. Never connect roof downspouts to perforated foundation footing drain tiles. The massive, concentrated water volume generated during heavy rainfall will overwhelm the perimeter tile, soaking the soil around the footings and flooding the basement or crawl space. Downspout runoff must remain entirely separate in dedicated, solid pipes.
Conclusion
A well-balanced roof drainage system shields your home from catastrophic water intrusion, foundation settlement, and fascia rot. By calculating runoff capacities, placing drop outlets strategically, and securing vertical piping plumb to the wall, homeowners can effectively eliminate gutter overflow during heavy seasonal downpours.
When multi-story rooflines, high eave heights, or extensive roof areas require comprehensive upgrades, working with experienced exterior professionals ensures durable results. Top Quality Contractors provides residential roofing, siding, and gutter services throughout Maryland, including Columbia, Germantown, Silver Spring, Ellicott City, Glen Burnie, Gaithersburg, and across Montgomery, Prince George’s, Baltimore, and Howard counties. For transparent estimates with no hidden fees, dependable workmanship, and custom-fabricated drainage solutions, explore expert seamless gutter installation in Maryland to keep your home protected year-round.